Product Description
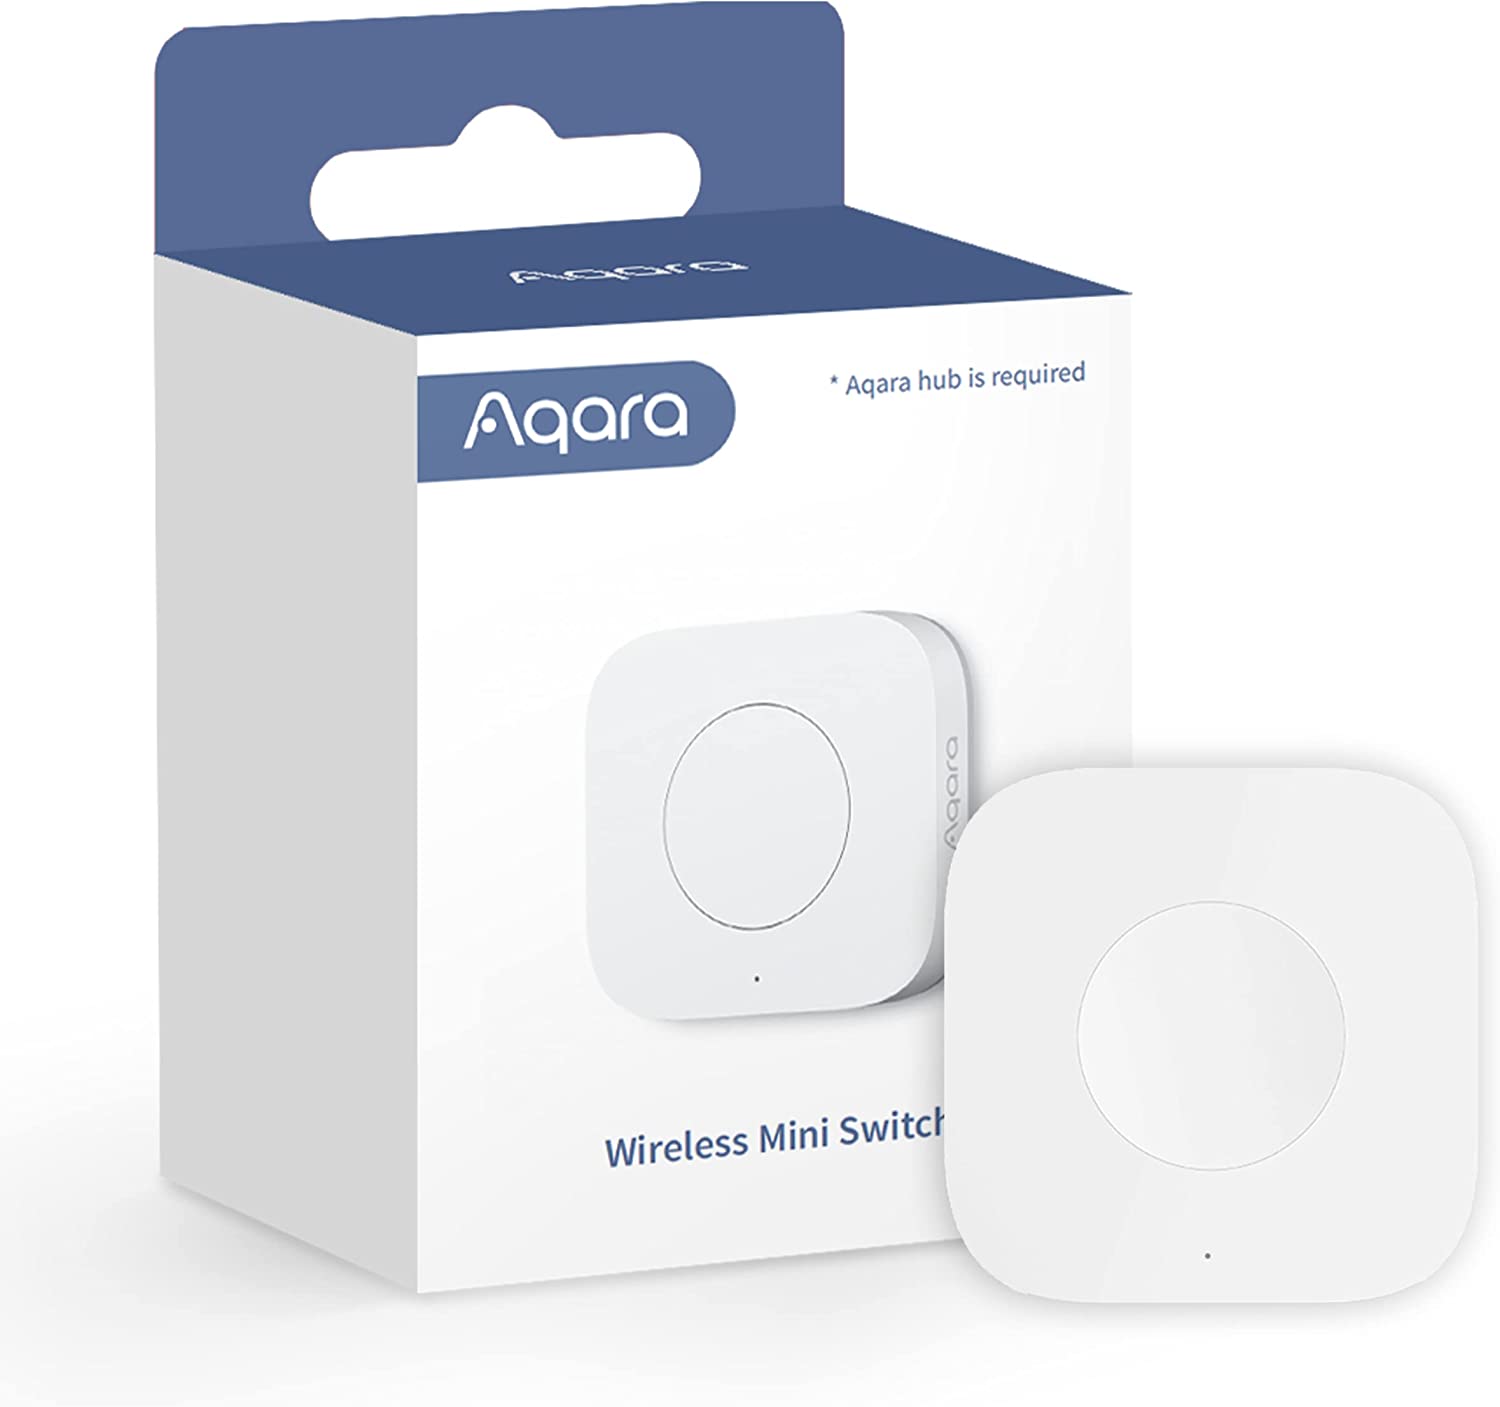
Introducing the Aqara Wireless Mini Switch – your compact and versatile solution for effortless smart home control. This pocket-sized marvel packs a punch, allowing you to manage your Aqara ecosystem with the touch of a button. Whether it’s adjusting lighting, triggering automation routines, or even sounding alarms, this wireless switch empowers you with the ultimate convenience. Its minimalist design fits seamlessly into any room, making it a discreet yet powerful addition to your smart home setup. With easy installation and long-lasting battery life, the Aqara Wireless Mini Switch puts control at your fingertips, offering a world of possibilities right in the palm of your hand.
Experience the freedom of control with the Aqara Wireless Mini Switch. This compact device is a true game-changer, enabling you to customize your smart home experience effortlessly. With a simple click, double click, or long press, you can activate a range of functions, from dimming lights for movie night to setting the perfect morning scene. Its wireless design means it can be placed virtually anywhere in your home, giving you quick and convenient access to smart device management. And, with an energy-efficient battery, you can enjoy uninterrupted control for extended periods. Elevate your home automation and simplify your life with the Aqara Wireless Mini Switch – it’s the switch that makes your smart home smarter.
Automation Ideas
The Aqara Wireless Mini Switch is a versatile smart device that can be used for a variety of automation tasks in your smart home. Here are some useful automation ideas to get you started:
- Lighting Control:
- Single Press: Turn on/off specific lights or groups of lights with a single press.
- Double Press: Dim the lights or change the color temperature when double-pressed.
- Long Press: Activate a scene that sets the perfect lighting ambiance for different occasions, such as movie night, reading, or dinner.
- Smart Plug Control:
- Single Press: Turn on/off connected smart plugs that control appliances or devices.
- Double Press: Trigger a sequence of actions, like turning off multiple plugs simultaneously when double-pressed.
- Home Security:
- Single Press: Activate or deactivate your home security system with a single press.
- Double Press: Activate an audible alarm or send alerts to your smartphone in case of emergency.
- Smart Blinds or Curtains:
- Single Press: Open or close your motorized blinds or curtains with a single press.
- Double Press: Set the blinds or curtains to a specific position when double-pressed.
- Climate Control:
- Single Press: Adjust the thermostat temperature up or down with a single press.
- Double Press: Set a comfort mode or trigger the thermostat’s energy-saving mode when double-pressed.
- Music and Entertainment:
- Single Press: Play or pause your music or media playback.
- Double Press: Skip to the next track or change the audio source when double-pressed.
- Morning and Evening Routines:
- Single Press: Initiate a morning routine that includes turning on lights, adjusting the thermostat, and playing your favorite morning playlist.
- Double Press: Start an evening routine that dims the lights, locks the doors, and sets the alarm.
- Guest Mode:
- Single Press: Activate a guest mode that adjusts lighting and temperature settings to welcome guests.
- Emergency Notifications:
- Single Press: Send an emergency notification to predefined contacts or trigger a siren in case of an emergency.
- Voice Assistant Control:
- Single Press: Activate your voice assistant (e.g., Alexa or Google Assistant) to perform tasks or answer questions.
Setup
Home Assistant
To set up an Aqara Wireless Mini Switch in Home Assistant, you’ll need a compatible Zigbee hub or coordinator. Here are the step-by-step instructions:
- Prepare Your Hardware:
- Make sure your Aqara Wireless Mini Switch is within range of your Zigbee hub or coordinator.
- Ensure that your Zigbee hub or coordinator is properly set up and operational.
- Pair the Mini Switch:
- Put your Zigbee hub or coordinator into pairing mode. Refer to your hub’s documentation for specific instructions.
- On the Aqara Wireless Mini Switch, press and hold the reset button (the small button on the back) for a few seconds until the LED indicator starts blinking.
- Add the Device in Home Assistant:
- Open the Home Assistant web interface.
- Click on “Configuration” in the sidebar.
- Under “Integrations,” click the “+” button to add an integration.
- Search for and select your Zigbee hub or coordinator (e.g., “Zigbee Home Automation”).
- Follow the on-screen instructions to complete the integration. This typically involves providing the required details for your Zigbee hub and connecting it to Home Assistant.
- Discover and Add the Mini Switch:
- After integrating your Zigbee hub, Home Assistant will automatically discover the Aqara Wireless Mini Switch.
- Go to the “Devices” section of Home Assistant to find the newly discovered switch.
- Click on the switch to add it to your Home Assistant setup.
- Configure Automations:
- Now that your Aqara Wireless Mini Switch is added to Home Assistant, you can create automations to control other devices or execute specific actions based on button presses (single press, double press, or long press).
- To create an automation, go to “Configuration” > “Automations” in the Home Assistant sidebar.
- Click the “+” button to create a new automation, then specify the trigger (button press) and the action you want to take (e.g., turning on lights, adjusting the thermostat, etc.).
- Testing:
- Test your Aqara Wireless Mini Switch to ensure that it triggers the desired actions in Home Assistant.
That’s it! You’ve successfully set up your Aqara Wireless Mini Switch in Home Assistant. You can now customize and expand your smart home automation based on your preferences and needs.
Amazon Alexa
To set up your Aqara Wireless Mini Switch with Amazon Alexa, you’ll need to ensure that the switch is already connected to your Aqara Hub or a compatible Zigbee hub that is linked to your Alexa account. Once that’s done, follow these step-by-step instructions to set up and use the switch with Amazon Alexa:
Step 1: Open the Alexa App
- Open the Amazon Alexa app on your smartphone or tablet.
Step 2: Discover Devices
- Tap the “Devices” icon at the bottom right of the screen.
- In the Devices section, tap the “+” (Add Device) icon at the top right.
Step 3: Set Up a Routine (Optional)
- If you want to create a routine using the Aqara Wireless Mini Switch, tap “Routines” at the bottom of the screen and create a new routine. You can specify actions triggered by button presses (single press, double press, or long press) from the switch.
Step 4: Discover New Devices
- Go back to the Devices screen by tapping the “Devices” icon at the bottom.
- Tap on “Add Device.”
- Choose “Other” as the device type.
Step 5: Press and Hold the Reset Button
- Now, go to your Aqara Wireless Mini Switch. Press and hold the reset button (the small button on the back) for a few seconds until the LED indicator starts blinking.
Step 6: Discover the Device
- Alexa will start searching for new devices. Wait until the Aqara Wireless Mini Switch is discovered. It will appear in the list of discovered devices.
Step 7: Assign the Device to a Group (Optional)
- You can assign the switch to a specific group if you have multiple smart devices. Follow the on-screen instructions to do this.
Step 8: Name Your Device
- Give your Aqara Wireless Mini Switch a name that you’ll use for voice commands. For example, “Living Room Switch.”
Step 9: Complete the Setup
- After you’ve assigned a name and configured any additional settings, tap “Finish” or “Done” to complete the setup.
Step 10: Test Your Device
- You can now test your Aqara Wireless Mini Switch by pressing it as per your configured actions or by using voice commands with Alexa.
Step 11: Voice Control (Optional)
- To control your devices using voice commands with Alexa, you can say something like, “Alexa, turn on [Device Name]” or “Alexa, activate [Routine Name].”
That’s it! You’ve successfully set up and integrated your Aqara Wireless Mini Switch with Amazon Alexa. You can now use voice commands or routines to control your smart devices based on the actions of the switch.
Apple HomeKit
To set up your Aqara Wireless Mini Switch in Apple HomeKit, you’ll need to ensure that it’s already paired with an Aqara Hub or a compatible Zigbee hub that is HomeKit-enabled. Once it’s connected to your hub, follow these step-by-step instructions to set up and use the switch with Apple HomeKit:
Step 1: Open the Apple Home App
- Open the Apple Home app on your iOS device.
Step 2: Add an Accessory
- Tap the “+” (Add Accessory) button in the top right corner of the Home app.
Step 3: Scan the HomeKit Code (Optional)
- If your Aqara Mini Switch has a HomeKit pairing code (typically found on a sticker or card that came with the device), you can scan it with your device’s camera. This will expedite the setup process.
Step 4: Manual Setup (If No Code)
- If you don’t have a HomeKit pairing code, or if scanning it doesn’t work, you can choose “Don’t Have a Code or Can’t Scan?” and manually enter the device’s information.
Step 5: Select the Accessory
- Find and select your Aqara Wireless Mini Switch from the list of available accessories. It should appear as a discovered accessory.
Step 6: Assign to a Room
- Assign the Mini Switch to a specific room within your HomeKit setup. This helps you organize and control devices more effectively.
Step 7: Customize the Name (Optional)
- You can customize the name of your Aqara Wireless Mini Switch to something more recognizable or memorable.
Step 8: Assign Actions (Optional)
- Depending on your preferences, you can set up various actions or scenes triggered by button presses (single press, double press, or long press) from the switch. This allows you to control other HomeKit-compatible devices.
Step 9: Complete the Setup
- After configuring the settings to your satisfaction, tap “Done” or “Finish” to complete the setup process.
Step 10: Test Your Device
- You can now test your Aqara Wireless Mini Switch by pressing it as per your configured actions.
Step 11: Voice Control (Optional)
- If you have a HomeKit-enabled smart speaker (e.g., HomePod or Apple TV), you can use Siri for voice control. Simply say something like, “Hey Siri, turn on [Device Name].”
That’s it! Your Aqara Wireless Mini Switch is now set up and integrated with Apple HomeKit. You can control your HomeKit-compatible devices using the switch and create automation routines based on its button presses for added convenience.
Google Home
Setting up your Aqara Wireless Mini Switch with Google Home involves using a compatible Zigbee hub or coordinator, as well as integrating that hub with your Google Home ecosystem. Here are step-by-step instructions on how to set it up:
Step 1: Prepare Your Hardware
- Ensure that your Aqara Wireless Mini Switch is within range of your Zigbee hub or coordinator.
- Make sure your Zigbee hub or coordinator is set up and functioning correctly.
Step 2: Connect Your Zigbee Hub to Google Home
- Open the Google Home app on your smartphone or tablet.
- Tap on your profile picture in the top right corner to access your account settings.
- Select “Assistant settings.”
- Scroll down and tap on “Home control.”
- Tap the “+” (Add) button to add a device or service.
- Search for and select your Zigbee hub or coordinator from the list of available services. Follow the on-screen instructions to link it to Google Home.
Step 3: Discover Devices
- After you’ve connected your Zigbee hub to Google Home, it will automatically discover any connected devices, including your Aqara Wireless Mini Switch.
Step 4: Set Up Routines (Optional)
- To create automation routines using the Mini Switch, go to the “Routines” section in the Google Home app. Here, you can specify actions triggered by button presses (single press, double press, or long press).
Step 5: Assign a Name to Your Device
- Find your Aqara Wireless Mini Switch in the list of discovered devices and assign it a name that you’ll use for voice commands. For example, “Living Room Switch.”
Step 6: Complete the Setup
- After you’ve named your device and configured any additional settings, tap “Finish” or “Done” to complete the setup.
Step 7: Test Your Device
- You can now test your Aqara Wireless Mini Switch by pressing it as per your configured actions or by using voice commands with Google Assistant.
Step 8: Voice Control (Optional)
- To control your devices using voice commands with Google Assistant, you can say something like, “Hey Google, turn on [Device Name]” or “Hey Google, activate [Routine Name].”
That’s it! You’ve successfully set up and integrated your Aqara Wireless Mini Switch with Google Home. You can now control your smart devices using voice commands or routines triggered by the actions of the switch.
Mi Home
To set up your Aqara Wireless Mini Switch in the Mi Home app, you’ll need to ensure that it’s already paired with an Aqara Hub or a compatible Zigbee hub that is linked to your Mi Home account. Once it’s connected to your hub, follow these step-by-step instructions to set up and use the switch with the Mi Home app:
Step 1: Open the Mi Home App
- Open the Mi Home app on your smartphone or tablet. Make sure you’re signed in to your Mi Home account.
Step 2: Add a Device
- Tap the “+” (Add) icon to add a new device to your Mi Home ecosystem.
Step 3: Select the Aqara Hub (Gateway)
- In the list of device categories, select “Gateway” or “Hub” since the Aqara Wireless Mini Switch is typically connected to an Aqara Hub or a compatible Zigbee hub acting as a gateway.
Step 4: Choose Your Hub
- Select the specific Aqara Hub or Zigbee gateway that your Aqara Wireless Mini Switch is paired with. Follow the on-screen instructions to add the hub to your Mi Home account if it’s not already added.
Step 5: Access the Hub’s Settings
- Once the hub is added, go to the hub’s settings within the Mi Home app.
Step 6: Add Subdevices
- In the hub’s settings, you should find an option to add subdevices or child devices. The Aqara Wireless Mini Switch is considered a subdevice since it’s connected to the hub.
Step 7: Add the Mini Switch
- Select the option to add a subdevice, and the Mi Home app will start searching for the Aqara Wireless Mini Switch.
Step 8: Pair the Mini Switch
- On your Aqara Wireless Mini Switch, press and hold the reset button (usually located on the back) for a few seconds until the LED indicator starts blinking.
Step 9: Device Discovered
- The Mi Home app should discover the Aqara Wireless Mini Switch. It will appear in the list of available devices for you to select.
Step 10: Assign a Name
- Give your Aqara Wireless Mini Switch a name that you’ll use to identify it within the Mi Home app.
Step 11: Complete the Setup
- After naming your device and configuring any additional settings, tap “Done” or “Finish” to complete the setup.
Step 12: Test Your Device
- You can now test your Aqara Wireless Mini Switch by pressing it as per your configured actions within the Mi Home app.
Step 13: Automation and Voice Control (Optional)
- You can create automation routines or use voice control with compatible voice assistants (e.g., Xiaomi XiaoAI, Google Assistant, or Amazon Alexa) to control your devices based on the actions of the Aqara Wireless Mini Switch.
That’s it! You’ve successfully set up and integrated your Aqara Wireless Mini Switch with the Mi Home app. You can now control your smart devices and create automation routines based on the button presses of the switch.
Other Resources
https://www.zigbee2mqtt.io/devices/WXKG11LM.html
https://www.aqara.com/en/product/wireless-mini-switch/specs


