
Product Description
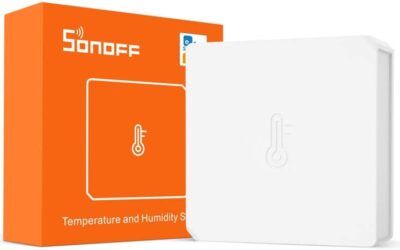
Introducing the Aqara Temperature and Humidity Sensor – your gateway to a smarter and more comfortable living environment. This advanced sensor puts you in control by providing real-time insights into your home’s temperature and humidity levels. Seamlessly integrate it into your Aqara smart home ecosystem to receive instant updates on your smartphone or smart hub. Its sleek and unobtrusive design allows easy placement in any room, ensuring you can effortlessly monitor and optimize your indoor environment. Whether you’re striving for optimal comfort or safeguarding against mold and mildew, the Aqara Temperature and Humidity Sensor empowers you to make informed decisions, making it an essential addition to your smart home setup.
Elevate your home’s ambiance with the Aqara Temperature and Humidity Sensor. This compact device not only offers accurate temperature and humidity readings but also enables you to create personalized automation scenarios. From adjusting your thermostat to triggering smart devices, the sensor’s compatibility with Aqara’s ecosystem enhances your home’s efficiency and comfort. With hassle-free installation and long-lasting performance, the Aqara Temperature and Humidity Sensor is your key to achieving a more harmonious and responsive living space, catering to your well-being and preferences like never before.
Automation Ideas
Aqara Temperature and Humidity Sensors are versatile devices that can be used in various automation scenarios to improve the comfort and efficiency of your smart home. Here are some useful automation ideas for your Aqara Temperature and Humidity Sensor:
- Climate Control – Use the sensor to control your thermostat. When the temperature or humidity goes above or below your desired levels, adjust the thermostat settings to maintain a comfortable environment.
- Dehumidifier/Air Purifier Control – Integrate the sensor with a dehumidifier or air purifier. When the humidity exceeds a certain threshold, turn on the dehumidifier or air purifier to maintain healthy air quality.
- Window and Ventilation Control – Open or close windows, blinds, or vents based on the indoor temperature and humidity. For example, open windows when it’s cooler outside or activate bathroom exhaust fans when humidity rises.
- Indoor Plant Care – Monitor the humidity levels in your home to ensure your indoor plants thrive. Receive alerts when humidity is too low or high for your plants’ needs.
- HVAC Efficiency – Optimize your heating and cooling system’s efficiency by adjusting settings based on the sensor’s data. For example, disable cooling when windows are open.
- Dampness Detection – Place the sensor in areas prone to dampness, such as basements. Receive notifications when humidity levels rise to prevent mold and mildew.
- Wine Cellar Monitoring – Use the sensor to monitor temperature and humidity in your wine cellar. Receive alerts if conditions are not ideal for wine storage.
- Baby’s Room Comfort – Ensure your baby’s room maintains a comfortable environment. Use the sensor to trigger a fan, humidifier, or heater as needed.
- Home Brewing – If you’re a homebrewer, monitor temperature and humidity during the fermentation process. Automate heating or cooling to maintain the desired conditions.
- Smart Fan Control – Use the sensor to control ceiling fans or standalone fans. When the temperature rises, automatically turn on fans to cool down the room.
- Energy Savings – Integrate the sensor into your energy-saving routines. For example, turn off heating or cooling systems when the sensor detects that windows are open.
- Prevent Frozen Pipes – Place the sensor near water pipes in cold areas of your home. If the temperature drops to a critical level, receive alerts to prevent frozen pipes.
- Protect Musical Instruments – If you have musical instruments like pianos or guitars, use the sensor to monitor humidity levels to prevent damage to the instruments.
- Drying Laundry – Use the sensor to determine when laundry is dry in an indoor drying area. Receive notifications when humidity levels indicate that the clothes are dry.
- Smart Sprinkler Control – Integrate the sensor with your sprinkler system to avoid watering your garden when humidity levels are high, saving water and preventing overwatering.
Remember to customize these automation ideas to match your specific needs and preferences. You can implement these automations using smart home platforms like Home Assistant, Apple HomeKit, Google Home, or third-party automation apps compatible with your Aqara Temperature and Humidity Sensor.
Setup
Home Assistant
To set up an Aqara Temperature and Humidity Sensor in Home Assistant, you’ll need to integrate it with a compatible Zigbee hub or bridge and configure Home Assistant to recognize and manage the sensor. Here are step-by-step instructions:
Prerequisites:
- Home Assistant: Ensure that you have Home Assistant installed and running on your system.
- Zigbee Coordinator: You’ll need a Zigbee coordinator (e.g., Zigbee USB stick or Zigbee hub) that is compatible with Home Assistant and supports the Aqara Temperature and Humidity Sensor.
- Aqara Temperature and Humidity Sensor: Make sure you have an Aqara Temperature and Humidity Sensor and that it’s set up and working with your Zigbee coordinator.
Steps:
- Install the Zigbee Integration:
- Open the Home Assistant dashboard in your web browser.
- Click on “Configuration” in the sidebar.
- Click on “Integrations.”
- Click the “+ Add Integration” button and search for “Zigbee Home Automation (ZHA).”
- Follow the on-screen instructions to install the Zigbee integration. When prompted, select the Zigbee coordinator you have connected to your system.
- Pair the Aqara Temperature and Humidity Sensor:
- Once the Zigbee integration is installed, click on it to access the Zigbee configuration.
- Click the “Add Devices” button.
- Put your Aqara Temperature and Humidity Sensor into pairing mode. Typically, this involves following the specific pairing instructions provided with the sensor.
- Home Assistant should detect the sensor. Click on it when it appears in the list of available devices.
- Follow the on-screen prompts to complete the pairing process. You may need to wait a few moments for the sensor to be fully initialized and recognized.
- Configure the Aqara Temperature and Humidity Sensor:
- After successfully pairing the sensor, you can configure its settings and behavior in Home Assistant.
- Go to the “Devices” tab in the Zigbee integration configuration.
- Find your Aqara Temperature and Humidity Sensor in the list of devices and click on it.
- Here, you can configure settings such as temperature and humidity reporting intervals, device name, and location. Adjust these settings according to your preferences.
- Create Automations (Optional):
- To make the most of your Aqara Temperature and Humidity Sensor, consider creating automations in Home Assistant. For example, you can create an automation to receive notifications or control HVAC systems based on temperature or humidity changes.
- Go to “Configuration” > “Automations” and click the “+ Add Automation” button.
- Follow the automation creation wizard to define the trigger (temperature or humidity changes), conditions, and actions (e.g., send a notification, adjust thermostat settings).
- Test the Setup:
- Test your Aqara Temperature and Humidity Sensor by exposing it to different temperature and humidity conditions to ensure it’s working as expected.
- Monitor the sensor’s status and events in the Home Assistant dashboard.
That’s it! You’ve successfully set up an Aqara Temperature and Humidity Sensor in Home Assistant. You can now use it to trigger various automations and enhance the comfort and efficiency of your smart home based on temperature and humidity data.
Amazon Alexa
Aqara devices do not natively integrate with Amazon Alexa. However, you can typically set up Aqara devices with Amazon Alexa through a compatible Zigbee hub or bridge that is linked to both systems. Here are the general steps on how to set up an Aqara Temperature and Humidity Sensor with Amazon Alexa:
Prerequisites:
- Aqara Temperature and Humidity Sensor: Ensure that you have an Aqara Temperature and Humidity Sensor and it’s set up and working with a compatible Zigbee hub or bridge.
- Amazon Alexa: Make sure you have an Amazon Echo device (e.g., Echo Dot, Echo Show) and the Amazon Alexa app installed on your smartphone.
Steps:
- Set up Your Aqara Temperature and Humidity Sensor:
- If you haven’t already, set up your Aqara Temperature and Humidity Sensor with the Aqara app and ensure it’s connected to your Zigbee hub or bridge.
- Add Your Zigbee Hub or Bridge to Amazon Alexa:
- Open the Amazon Alexa app on your smartphone.
- Tap the “Devices” icon at the bottom right.
- Tap the “+” icon to add a new device.
- Select “Add Device.”
- If you have a Zigbee hub or bridge (like a compatible smart home hub) that’s connected to both your Aqara Temperature and Humidity Sensor and Alexa, you can try the Zigbee discovery option. Otherwise, look for the specific brand of your hub or bridge (e.g., SmartThings, Hubitat) in the list of smart home hubs.
- Follow the on-screen instructions to discover your Zigbee hub or bridge. The Alexa app will scan for compatible devices.
- Create Automations or Routines (Optional):
- Once your Zigbee hub or bridge is linked to Amazon Alexa, you can create routines or automations to trigger specific actions when temperature or humidity conditions change. For example, you can create a routine that turns on a fan when the temperature exceeds a certain level.
- To create routines in the Alexa app, go to “More” > “Routines” > “+” sign to create a new routine.
- Configure the Aqara Temperature and Humidity Sensor:
- After successfully adding your Zigbee hub or bridge to Amazon Alexa, your Aqara Temperature and Humidity Sensor should appear in the list of devices.
- You can rename the sensor and assign it to rooms for easier management within the Alexa app.
- Test the Setup:
- Test your Aqara Temperature and Humidity Sensor by exposing it to different temperature and humidity conditions to ensure it’s correctly integrated with Amazon Alexa.
Please note that the compatibility and integration options can change over time, so it’s a good idea to check for any updates or changes in compatibility between Aqara devices and Amazon Alexa. Additionally, you may need to use third-party skills or services like IFTTT to bridge the gap between Aqara and Alexa if native integration is not available. Always refer to the latest instructions provided by Aqara and Amazon for the most accurate setup steps.
Apple HomeKit
To set up an Aqara Temperature and Humidity Sensor with Apple HomeKit, you’ll need to use a compatible Zigbee hub or bridge that supports HomeKit. Aqara devices can be integrated with HomeKit through such a bridge. Here are the general steps on how to set up an Aqara Temperature and Humidity Sensor in Apple HomeKit:
Prerequisites:
- Aqara Temperature and Humidity Sensor: Ensure that you have an Aqara Temperature and Humidity Sensor and it’s set up and working with a compatible Zigbee hub or bridge. Aqara’s M2 or M1S hub is known to work well with HomeKit.
- iOS Device: You’ll need an iPhone or iPad with iOS 14 or later installed.
- Apple Home App: Make sure you have the Apple Home app installed on your iOS device.
Steps:
- Set Up Your Aqara Temperature and Humidity Sensor with the Aqara App:
- If you haven’t already, set up your Aqara Temperature and Humidity Sensor with the Aqara app and ensure it’s connected to your Zigbee hub (M2 or M1S).
- Add the Aqara Hub to HomeKit:
- Open the Aqara app on your iOS device.
- Tap on the Aqara hub that your Aqara Temperature and Humidity Sensor is connected to.
- Go to “HomeKit Settings.”
- Follow the on-screen instructions to add the Aqara hub to HomeKit. You’ll be asked to scan a QR code or enter a HomeKit setup code provided with the hub.
- Once added, the Aqara hub and all devices connected to it, including the Aqara Temperature and Humidity Sensor, should appear in the Apple Home app.
- Configure the Aqara Temperature and Humidity Sensor:
- Open the Apple Home app on your iOS device.
- Find your Aqara Temperature and Humidity Sensor in the Home app’s device list.
- You can rename the sensor and assign it to rooms for easier management.
- Create Automations (Optional):
- To make the most of your Aqara Temperature and Humidity Sensor, consider creating automations within the Home app. For example, you can create an automation to receive notifications or control smart devices when temperature or humidity conditions change.
- Go to “Automation” in the Home app and tap the “+” icon to create a new automation.
- Test the Setup:
- After successful setup, you can test the Aqara Temperature and Humidity Sensor by adjusting temperature and humidity conditions to ensure it’s working as expected.
Please note that the specific steps and options may vary slightly depending on the Aqara hub model and firmware version you are using. Always refer to the latest instructions provided by Aqara for the most accurate setup steps, and make sure your Aqara hub is compatible with HomeKit.
Once set up, you can use the Apple Home app to monitor and control your Aqara Temperature and Humidity Sensor, create automations, and integrate it with other HomeKit-compatible smart devices in your home.
Google Home
Aqara devices do not have native integration with Google Home. However, you can typically set up Aqara devices with Google Home through a compatible Zigbee hub or bridge that supports Google Assistant. Here are the general steps on how to set up an Aqara Temperature and Humidity Sensor with Google Home:
Prerequisites:
- Aqara Temperature and Humidity Sensor: Ensure that you have an Aqara Temperature and Humidity Sensor and it’s set up and working with a compatible Zigbee hub or bridge.
- Google Home: Make sure you have a Google Home device (e.g., Google Nest Mini, Google Nest Hub) and the Google Home app installed on your smartphone.
Steps:
- Set up Your Aqara Temperature and Humidity Sensor:
- If you haven’t already, set up your Aqara Temperature and Humidity Sensor with the Aqara app and ensure it’s connected to your Zigbee hub or bridge.
- Add Your Zigbee Hub or Bridge to Google Home:
- Open the Google Home app on your smartphone.
- Tap on the “+” icon to add a new device.
- Select “Set up device.”
- Choose “Have something already set up?”
- Search for and select your compatible Zigbee hub or bridge. If it’s not listed, you may need to use third-party services like Home Assistant or IFTTT to bridge the gap between Aqara and Google Home.
- Follow the on-screen instructions to link your hub or bridge with Google Home. This typically involves signing in with your account for the hub/bridge.
- Discover Devices in Google Home:
- Once your hub or bridge is linked to Google Home, you can discover devices connected to it.
- Open the Google Home app.
- Tap “Set up device” or “Add.”
- Select “Works with Google.”
- Search for your Zigbee hub or bridge (the one you linked earlier) and follow the on-screen instructions to complete the setup.
- Configure the Aqara Temperature and Humidity Sensor:
- After successfully adding your Zigbee hub or bridge to Google Home, your Aqara Temperature and Humidity Sensor should appear in the list of devices.
- You can rename the sensor and assign it to rooms for easier management within the Google Home app.
- Test the Setup:
- Test your Aqara Temperature and Humidity Sensor by adjusting temperature and humidity conditions to ensure it’s correctly integrated with Google Home.
Please note that the compatibility and integration options can change over time, so it’s a good idea to check for any updates or changes in compatibility between Aqara devices and Google Home. Additionally, you may need to use third-party services or platforms to bridge the gap between Aqara and Google Home if native integration is not available. Always refer to the latest instructions provided by Aqara and Google for the most accurate setup steps.
Mi Home
To set up an Aqara Temperature and Humidity Sensor in the Mi Home app, you’ll need to integrate it with a compatible Zigbee hub or bridge. Here are the step-by-step instructions for setting up the sensor in the Mi Home app:
Prerequisites:
- Aqara Temperature and Humidity Sensor: Ensure that you have an Aqara Temperature and Humidity Sensor and it’s set up and working.
- Mi Home App: Download and install the Mi Home app on your smartphone. You can find it on the App Store (iOS) or Google Play Store (Android).
- Zigbee Hub or Bridge: You’ll need a Zigbee hub or bridge that is compatible with the Mi Home ecosystem.
Steps:
- Open the Mi Home App and Sign In:
- Launch the Mi Home app on your smartphone.
- Sign in to your Mi account or create one if you don’t have an account already.
- Add a Device:
- Tap the “+” icon in the top-right corner of the Mi Home app to add a new device.
- Select the Category:
- In the “Add Device” screen, you will see a list of categories. Find and select “Environmental sensor.”
- Choose Your Device Type:
- Under the “Environmental sensor” category, select “Temperature and humidity sensor.”
- Put Your Aqara Temperature and Humidity Sensor in Pairing Mode:
- Follow the on-screen instructions to put your Aqara Temperature and Humidity Sensor into pairing mode. Typically, this involves pressing a button on the sensor or following the specific pairing instructions provided with the sensor.
- Connect to the Sensor:
- Once the app detects your Aqara Temperature and Humidity Sensor, it will prompt you to confirm the device. Select your sensor from the list.
- Configure Device Name and Location:
- You can choose to assign a name to your Aqara Temperature and Humidity Sensor and specify its location or room in your home.
- Complete the Setup:
- Follow the remaining on-screen prompts to complete the setup process.
- Test the Aqara Temperature and Humidity Sensor:
- After successful setup, you can test the sensor by placing it in different environments with varying temperature and humidity levels. Ensure it’s working as expected.
- Automation and Smart Home Integration (Optional):
- To make the most of your Aqara Temperature and Humidity Sensor, consider creating automations within the Mi Home app. You can use it to trigger actions such as receiving notifications, adjusting smart thermostat settings, or controlling humidifiers or dehumidifiers.
- Monitor and Control:
- Use the Mi Home app to monitor and control your Aqara Temperature and Humidity Sensor as needed. You can view its real-time data, set up notifications, and adjust settings.
That’s it! You’ve successfully set up an Aqara Temperature and Humidity Sensor in the Mi Home app. You can now use it to monitor indoor environmental conditions, create automations, and enhance the comfort and efficiency of your smart home.
Other Resources
https://www.zigbee2mqtt.io/devices/WSDCGQ11LM.html
https://www.aqara.com/en/product/temperature-humidity-sensor/specs/