Product Description
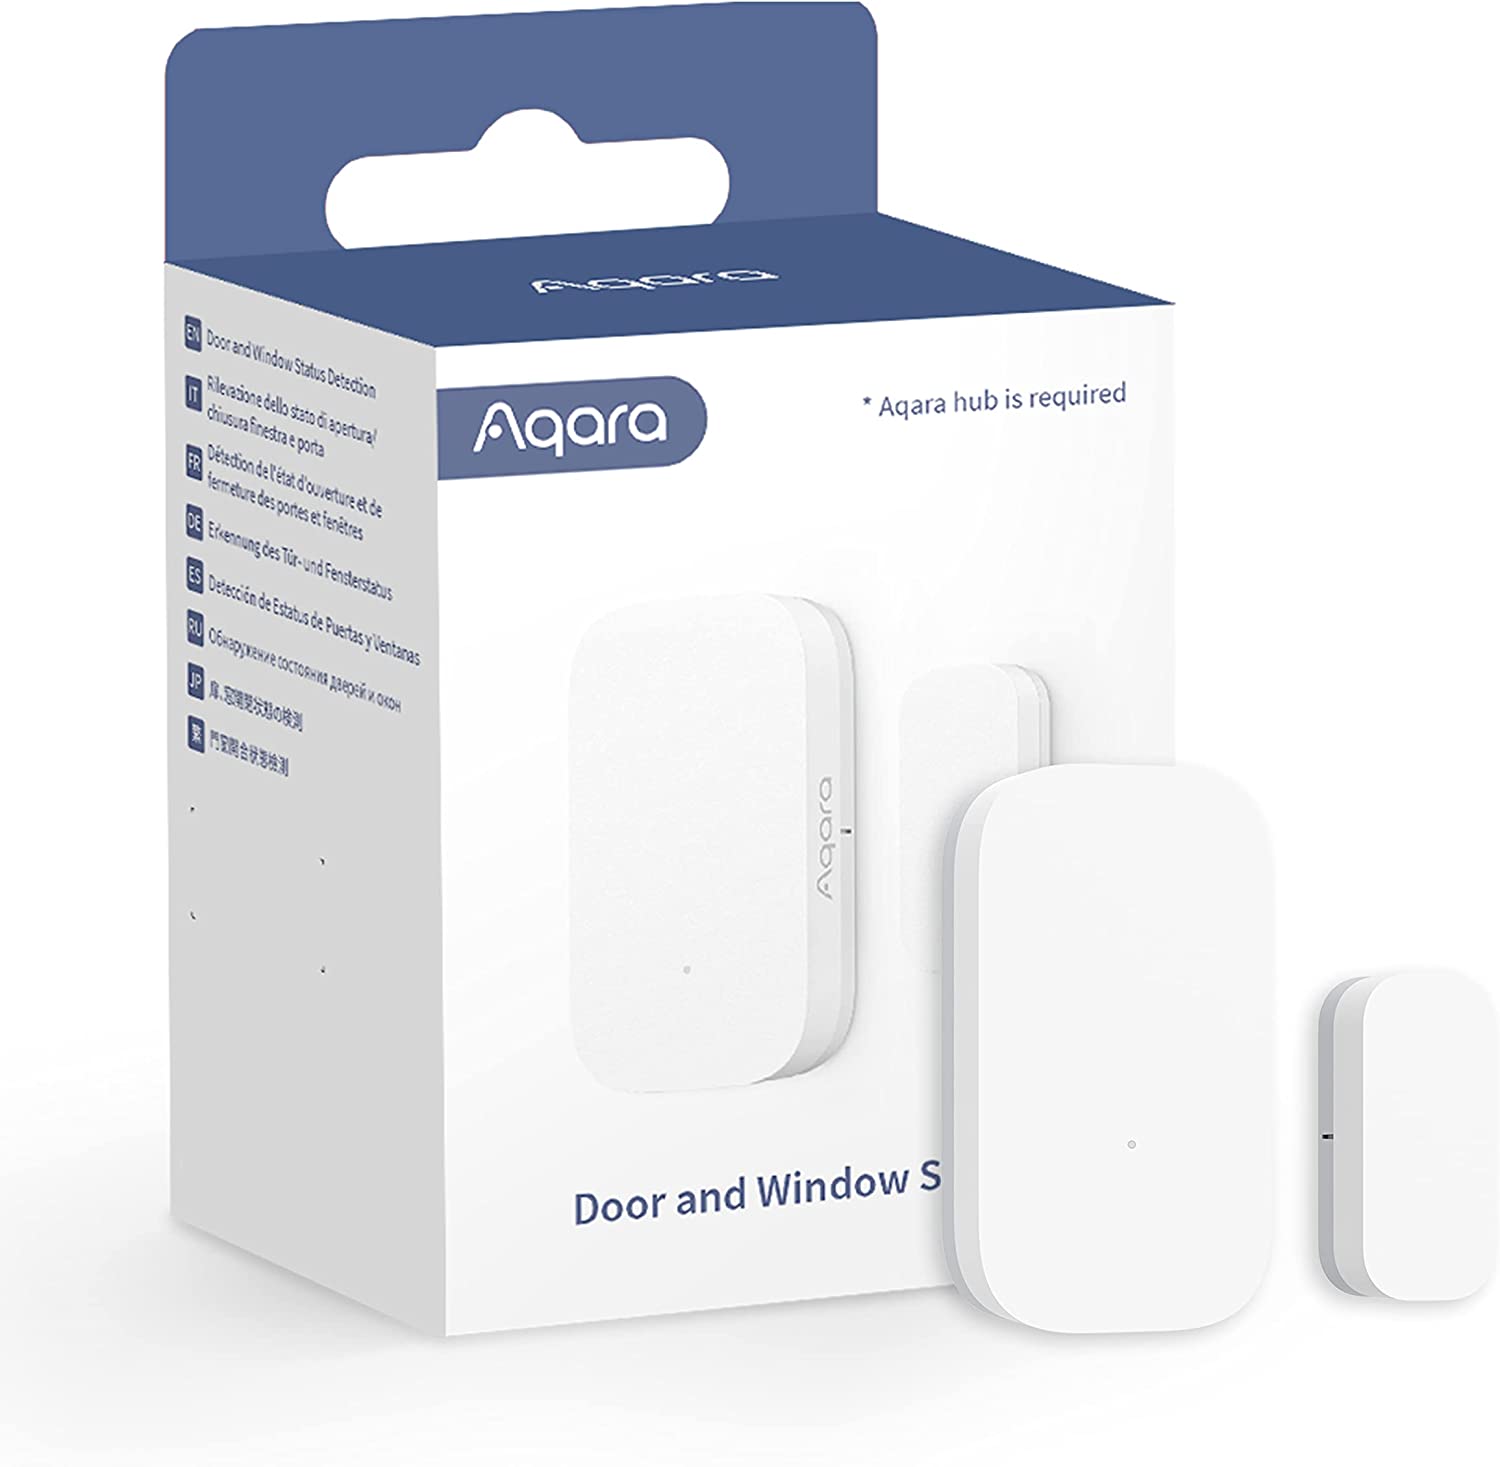
Introducing the Aqara Door and Window Sensor – your ultimate home security companion. Designed to provide unmatched convenience and peace of mind, this compact device effortlessly enhances the security of your living space. Seamlessly compatible with Aqara’s smart home ecosystem, this sensor effectively monitors the status of doors and windows, offering real-time alerts through your smartphone or smart hub. Its discreet design ensures a seamless blend with any decor, while its simple installation process guarantees hassle-free setup, requiring only a few minutes. Whether you’re at home or on the go, rest assured that the Aqara Door and Window Sensor is diligently safeguarding your space, making it an indispensable addition to any smart home setup.
Elevate your home’s security with the Aqara Door and Window Sensor, a cutting-edge solution that redefines safety. This sensor employs advanced technology to detect the status of doors and windows, instantly notifying you of any unexpected openings through intuitive mobile alerts. Seamlessly integrate this sensor into your existing smart home ecosystem, leveraging its compatibility with Aqara’s range of devices for a comprehensive security network. Its unobtrusive profile ensures a sleek aesthetic, seamlessly blending with your interior. With its user-friendly installation process and dependable performance, the Aqara Door and Window Sensor stands as an indispensable asset in fortifying your home against potential intrusions, empowering you with the confidence to live securely.
Automation Ideas
Aqara Door and Window Sensors are versatile devices that can be used in various automation scenarios to enhance the security and convenience of your smart home. Here are some useful automation ideas for your Aqara Door and Window Sensor:
- Security Alerts – Receive instant notifications or alarms when a door or window is opened unexpectedly, enhancing the security of your home.
- Entryway Lighting – Automatically turn on lights in the entryway when a door is opened and turn them off when the door is closed.
- Arming and Disarming Security Systems – Use the sensor to trigger arming or disarming of your home security system when doors are opened or closed.
- Child Safety – Set up notifications to alert you when a child’s bedroom window or door is opened, providing peace of mind and safety.
- Pet Monitoring – Monitor if your pet is trying to escape by attaching the sensor to doors leading outside. Receive alerts if they succeed.
- Garage Door Monitoring – Attach the sensor to your garage door and receive alerts when it’s opened or closed. Integrate with garage door control for automation.
- Smart Lock Integration – Link the sensor with a smart lock to automatically lock the door when it’s closed or unlock when it’s opened using authorized access methods.
- Energy Efficiency – Ensure doors and windows are closed when the heating or cooling system is active to save energy. Use the sensor to trigger HVAC adjustments.
- Home Theater Mode – Trigger home theater equipment, like projectors or screens, to turn on or off when a dedicated theater room door is opened or closed.
- Window Blind Control – Automate window blinds or curtains to open or close based on the position of doors or windows to regulate natural light.
- Guest Notifications – Receive notifications when guests or family members arrive home or leave by placing sensors on entry doors.
- Intruder Deterrence – Simulate presence by setting up lights, music, or other devices to activate when a door or window is opened while you’re away.
- Emergency Alerts – In the event of a break-in, use the sensor to trigger an emergency alert system, such as sirens or security camera recording.
- Medicine Cabinet Monitoring – Attach the sensor to a medicine cabinet to monitor if it’s opened. Receive reminders or alerts for medication schedules.
- Closet Lighting – Automatically illuminate closets or storage spaces when their doors are opened.
- Customized Notifications – Create customized notifications or announcements for specific doors or windows to distinguish between different entry points.
- Vacation Mode – While you’re away, simulate activity by having the sensor trigger various smart devices at different times, making it appear as if someone is at home.
- Morning Routine – Trigger your morning routine, such as turning on lights, adjusting the thermostat, and brewing coffee, when you open the bedroom door.
Remember to customize these automation ideas to match your specific needs and preferences. You can implement these automations using smart home platforms like Home Assistant, Apple HomeKit, Google Home, or third-party automation apps compatible with your Aqara Door and Window Sensor.
Setup
Home Assistant
To set up an Aqara Door and Window Sensor in Home Assistant, you’ll need to integrate it with a compatible Zigbee hub or bridge and configure Home Assistant to recognize and manage the sensor. Here are step-by-step instructions for setting up the sensor in Home Assistant:
Prerequisites:
- Home Assistant: Ensure that you have Home Assistant installed and running on your system.
- Zigbee Coordinator: You’ll need a Zigbee coordinator (e.g., Zigbee USB stick or Zigbee hub) that is compatible with Home Assistant and supports the Aqara Door and Window Sensor.
- Aqara Door and Window Sensor: Make sure you have an Aqara Door and Window Sensor and that it’s set up and working with your Zigbee coordinator.
Steps:
- Install the Zigbee Integration:
- Open the Home Assistant dashboard in your web browser.
- Click on “Configuration” in the sidebar.
- Click on “Integrations.”
- Click the “+ Add Integration” button and search for “Zigbee Home Automation (ZHA).”
- Follow the on-screen instructions to install the Zigbee integration. When prompted, select the Zigbee coordinator you have connected to your system.
2. Pair the Aqara Door and Window Sensor:
- Once the Zigbee integration is installed, click on it to access the Zigbee configuration.
- Click the “Add Devices” button.
- Put your Aqara Door and Window Sensor into pairing mode. Typically, this involves following the specific pairing instructions provided with the sensor.
- Home Assistant should detect the sensor. Click on it when it appears in the list of available devices.
- Follow the on-screen prompts to complete the pairing process. You may need to wait a few moments for the sensor to be fully initialized and recognized.
3. Configure the Aqara Door and Window Sensor:
- After successfully pairing the sensor, you can configure its settings and behavior in Home Assistant.
- Go to the “Devices” tab in the Zigbee integration configuration.
- Find your Aqara Door and Window Sensor in the list of devices and click on it.
- Here, you can rename the sensor, assign it to rooms, and customize the device settings.
4. Create Automations (Optional):
- To make the most of your Aqara Door and Window Sensor, consider creating automations in Home Assistant. For example, you can create an automation to receive notifications or control smart lights when the door or window is opened or closed.
- Go to “Configuration” > “Automations” and click the “+ Add Automation” button.
- Follow the automation creation wizard to define triggers (door and window status changes), conditions, and actions (e.g., send a notification, turn on lights).
5. Test the Setup:
- Test your Aqara Door and Window Sensor by opening and closing the door or window to ensure it’s working as expected.
- Monitor the sensor’s status and events in the Home Assistant dashboard.
You can now use it to monitor door and window status, create automations, and enhance the security and convenience of your smart home based on door and window events.
Amazon Alexa
Aqara Door and Window Sensors don’t have native integration with Amazon Alexa. However, you can typically set up Aqara devices with Amazon Alexa through a compatible Zigbee hub or bridge that is linked to both systems. Here are the general steps on how to set up an Aqara Door and Window Sensor with Amazon Alexa:
Prerequisites:
- Aqara Door and Window Sensor: Ensure that you have an Aqara Door and Window Sensor and it’s set up and working with a compatible Zigbee hub or bridge.
- Amazon Alexa: Make sure you have an Amazon Echo device (e.g., Echo Dot, Echo Show) and the Amazon Alexa app installed on your smartphone.
Steps:
- Set up Your Aqara Door and Window Sensor:
- If you haven’t already, set up your Aqara Door and Window Sensor with the Aqara app and ensure it’s connected to your Zigbee hub or bridge.
- Add Your Zigbee Hub or Bridge to Amazon Alexa:
- Open the Amazon Alexa app on your smartphone.
- Tap the “Devices” icon at the bottom right.
- Tap the “+” icon to add a new device.
- Select “Add Device.”
- If you have a Zigbee hub or bridge (like a compatible smart home hub) that’s connected to both your Aqara Door and Window Sensor and Alexa, you can try the Zigbee discovery option. Otherwise, look for the specific brand of your hub or bridge (e.g., SmartThings, Hubitat) in the list of smart home hubs.
- Follow the on-screen instructions to discover your Zigbee hub or bridge. The Alexa app will scan for compatible devices.
- Create Routines (Optional):
- Once your hub or bridge is linked to Amazon Alexa, you can create routines or automations to trigger specific actions when the door and window status changes. For example, you can create a routine that announces when a door is opened.
- To create routines in the Alexa app, go to “More” > “Routines” > “+” sign to create a new routine.
- Configure the Aqara Door and Window Sensor:
- After successfully adding your Zigbee hub or bridge to Amazon Alexa, your Aqara Door and Window Sensor should appear in the list of devices.
- You can rename the sensor and assign it to rooms for easier management within the Alexa app.
- Test the Setup:
- Test your Aqara Door and Window Sensor by opening and closing the door or window to ensure it’s correctly integrated with Amazon Alexa.
Please note that the compatibility and integration options can change over time, so it’s a good idea to check for any updates or changes in compatibility between Aqara devices and Amazon Alexa. Additionally, you may need to use third-party skills or services like IFTTT to bridge the gap between Aqara and Alexa if native integration is not available. Always refer to the latest instructions provided by Aqara and Amazon for the most accurate setup steps.
Apple HomeKit
To set up an Aqara Door and Window Sensor in Apple HomeKit, you’ll need to use a compatible Zigbee hub or bridge that supports HomeKit. Aqara devices can be integrated with HomeKit through such a bridge. Here are the general steps on how to set up an Aqara Door and Window Sensor in Apple HomeKit:
Prerequisites:
- Aqara Door and Window Sensor: Ensure that you have an Aqara Door and Window Sensor and it’s set up and working with a compatible Zigbee hub or bridge. Aqara’s M2 or M1S hub is known to work well with HomeKit.
- iOS Device: You’ll need an iPhone or iPad with iOS 14 or later installed.
- Apple Home App: Make sure you have the Apple Home app installed on your iOS device.
Steps:
- Add the Aqara Hub to HomeKit:
- If you haven’t already, set up your Aqara Door and Window Sensor with the Aqara app and ensure it’s connected to your Zigbee hub (M2 or M1S).
- Configure the Aqara Door and Window Sensor:
- Open the Apple Home app on your iOS device.
- Find your Aqara Door and Window Sensor in the Home app’s device list.
- You can rename the sensor and assign it to rooms for easier management.
- Create Automations (Optional):
- To make the most of your Aqara Door and Window Sensor, consider creating automations within the Home app. For example, you can create an automation to receive notifications or control smart lights when the door or window is opened or closed.
- Go to “Automation” in the Home app and tap the “+” icon to create a new automation.
- Test the Setup:
- After successful setup, you can test the Aqara Door and Window Sensor by opening and closing the door or window to ensure it’s working as expected.
Please note that the specific steps and options may vary slightly depending on the Aqara hub model and firmware version you are using. Always refer to the latest instructions provided by Aqara for the most accurate setup steps, and make sure your Aqara hub is compatible with HomeKit.
Once set up, you can use the Apple Home app to monitor and control your Aqara Door and Window Sensor, create automations, and integrate it with other HomeKit-compatible smart devices in your home
Google Home
Aqara devices do not have native integration with Google Home. However, you can typically set up Aqara devices with Google Home through a compatible Zigbee hub or bridge that supports Google Assistant. Here are the general steps on how to set up an Aqara Door and Window Sensor with Google Home:
Prerequisites:
- Aqara Door and Window Sensor: Ensure that you have an Aqara Door and Window Sensor and it’s set up and working with a compatible Zigbee hub or bridge.
- Google Home: Make sure you have a Google Home device (e.g., Google Nest Mini, Google Nest Hub) and the Google Home app installed on your smartphone.
Steps:
- Set up Your Aqara Door and Window Sensor:
- If you haven’t already, set up your Aqara Door and Window Sensor with the Aqara app and ensure it’s connected to your Zigbee hub or bridge.
- Add Your Zigbee Hub or Bridge to Google Home:
- Open the Google Home app on your smartphone.
- Tap on the “+” icon to add a new device.
- Select “Set up device.”
- Choose “Have something already set up?”
- Search for and select your compatible Zigbee hub or bridge. If it’s not listed, you may need to use third-party services like Home Assistant or IFTTT to bridge the gap between Aqara and Google Home.
- Follow the on-screen instructions to link your hub or bridge with Google Home. This typically involves signing in with your account for the hub/bridge.
- Discover Devices in Google Home:
- Once your hub or bridge is linked to Google Home, you can discover devices connected to it.
- Open the Google Home app.
- Tap “Set up device” or “Add.”
- Select “Works with Google.”
- Search for your Zigbee hub or bridge (the one you linked earlier) and follow the on-screen instructions to complete the setup.
- Configure the Aqara Door and Window Sensor:
- After successfully adding your Zigbee hub or bridge to Google Home, your Aqara Door and Window Sensor should appear in the list of devices.
- You can rename the sensor and assign it to rooms for easier management within the Google Home app.
- Test the Setup:
- Test your Aqara Door and Window Sensor by opening and closing the door or window to ensure it’s correctly integrated with Google Home.
Please note that the compatibility and integration options can change over time, so it’s a good idea to check for any updates or changes in compatibility between Aqara devices and Google Home. Additionally, you may need to use third-party services or platforms to bridge the gap between Aqara and Google Home if native integration is not available. Always refer to the latest instructions provided by Aqara and Google for the most accurate setup steps.
Mi Home
To set up an Aqara Door and Window Sensor in the Mi Home app, you’ll need to integrate it with a compatible Zigbee hub or bridge. Here are the step-by-step instructions for setting up the sensor in the Mi Home app:
Prerequisites:
- Aqara Door and Window Sensor: Ensure that you have an Aqara Door and Window Sensor and it’s set up and working.
- Mi Home App: Download and install the Mi Home app on your smartphone. You can find it on the App Store (iOS) or Google Play Store (Android).
- Zigbee Hub or Bridge: You’ll need a Zigbee hub or bridge that is compatible with the Mi Home ecosystem.
Steps:
- Open the Mi Home App and Sign In:
- Launch the Mi Home app on your smartphone.
- Sign in to your Mi account or create one if you don’t have an account already.
- Add a Device:
- Tap the “+” icon in the top-right corner of the Mi Home app to add a new device.
- Select the Category:
- In the “Add Device” screen, you will see a list of categories. Find and select “Environmental sensor.”
- Choose Your Device Type:
- Under the “Environmental sensor” category, select “Door and window sensor.”
- Put Your Aqara Door and Window Sensor in Pairing Mode:
- Follow the on-screen instructions to put your Aqara Door and Window Sensor into pairing mode. Typically, this involves pressing a button on the sensor or following the specific pairing instructions provided with the sensor.
- Connect to the Sensor:
- Once the app detects your Aqara Door and Window Sensor, it will prompt you to confirm the device. Select your sensor from the list.
- Follow the on-screen prompts to complete the pairing process. You may need to wait a few moments for the sensor to be fully initialized and recognized.
- Configure the Aqara Door and Window Sensor:
- After successfully pairing the sensor, you can configure its settings and behavior in the Mi Home app.
- Go to the “Devices” section in the app.
- Find your Aqara Door and Window Sensor in the list of devices and tap on it.
- Here, you can rename the sensor, assign it to rooms, and customize the device settings.
- Create Automations (Optional):
- To make the most of your Aqara Door and Window Sensor, consider creating automations within the Mi Home app. For example, you can create an automation to receive notifications or control smart lights when the door or window is opened or closed.
- Go to “Automation” in the Mi Home app and tap the “+” icon to create a new automation.
- Test the Aqara Door and Window Sensor:
- After successful setup, you can test the sensor by opening and closing the door or window to ensure it’s working as expected.
- Monitor and Control:
- Use the Mi Home app to monitor and control your Aqara Door and Window Sensor as needed. You can view its real-time status, set up notifications, and adjust settings.
That’s it! You’ve successfully set up an Aqara Door and Window Sensor in the Mi Home app. You can now use it to monitor door and window status, create automations, and enhance the security and convenience of your smart home based on door and window events.
Other Resources
https://www.zigbee2mqtt.io/devices/MCCGQ11LM.html
https://www.aqara.com/en/product/door-and-window-sensor/specs/


