Product Description
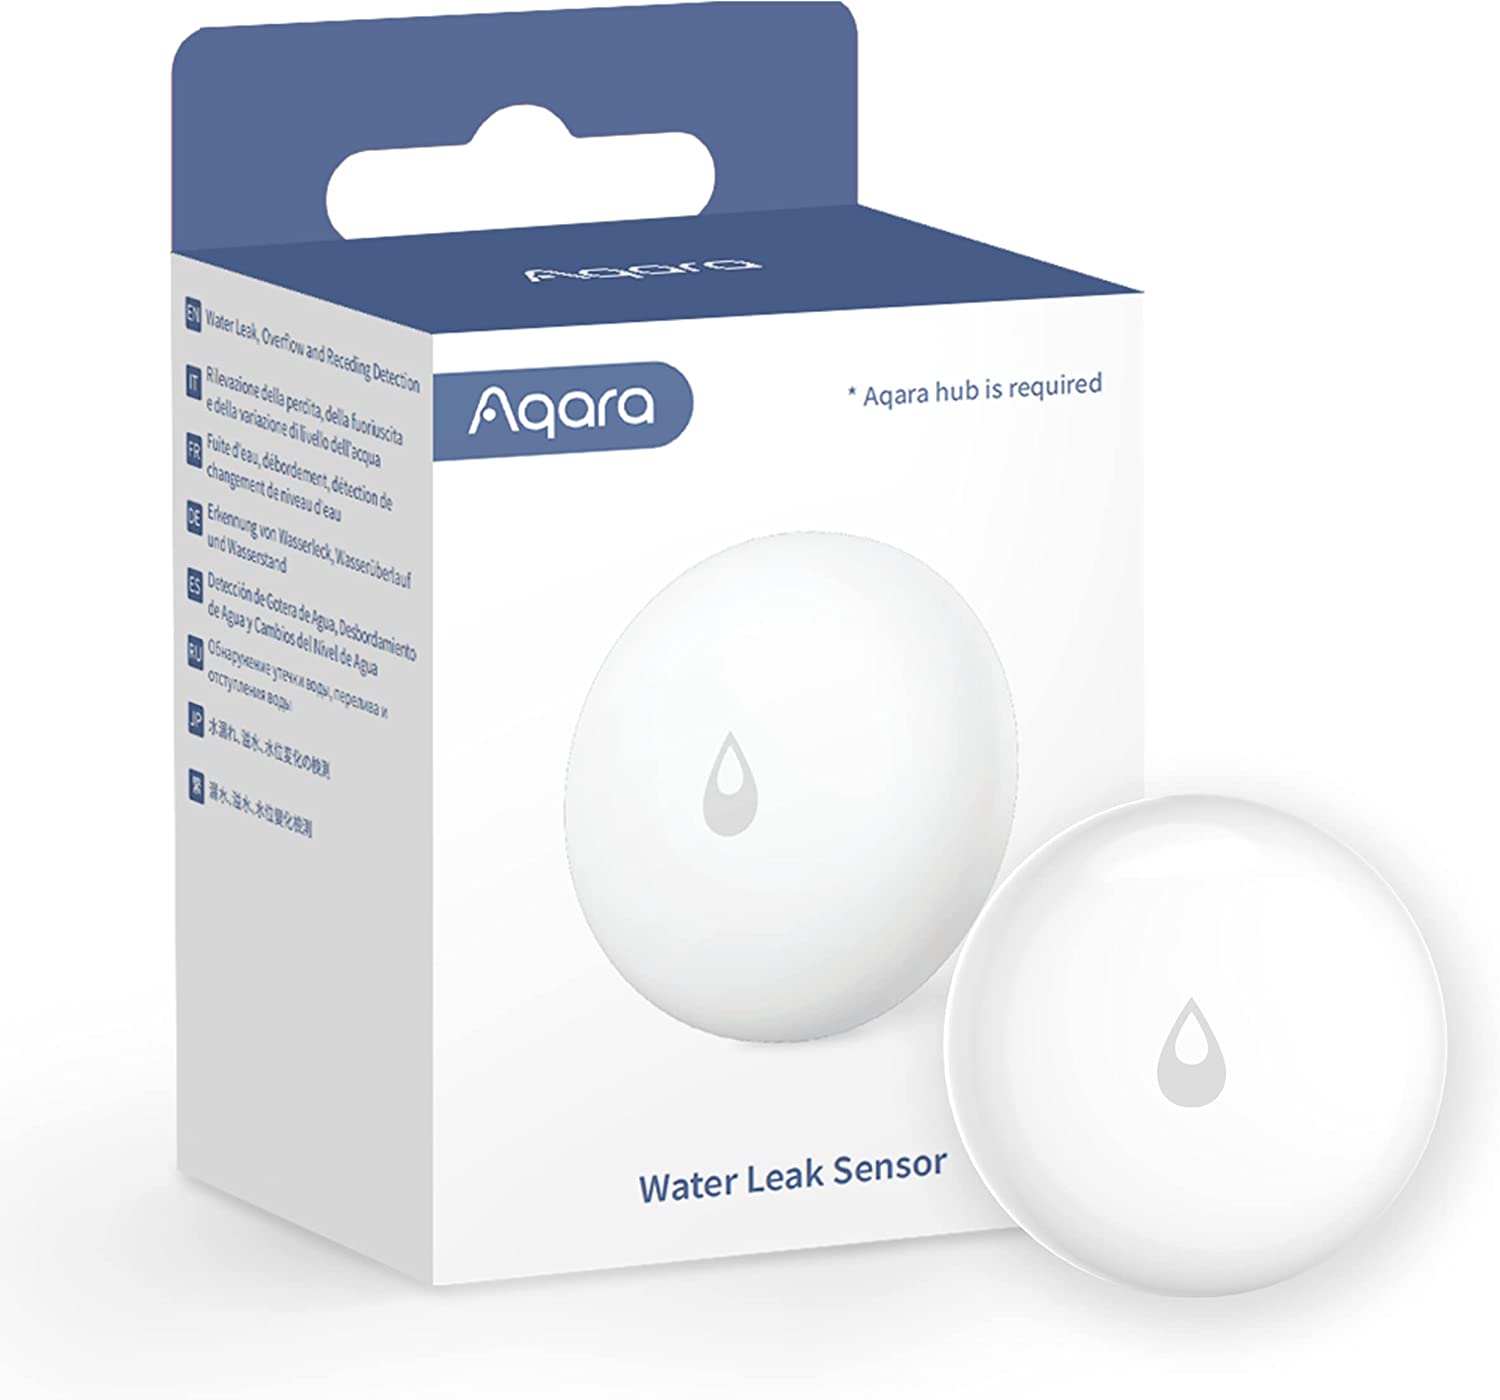
Introducing the Aqara Water Leak Sensor – your vigilant guardian against unexpected water damage. This smart sensor is designed to provide you with peace of mind by alerting you to potential leaks and floods in your home. Its compact and discreet design allows for easy placement in vulnerable areas, such as beneath sinks, near appliances, or in basements. When it detects moisture or water, it sends instant notifications to your smartphone, allowing you to take immediate action and prevent costly water damage. With the Aqara Water Leak Sensor, you can confidently protect your home, valuables, and cherished memories from the devastating effects of water-related incidents.
The Aqara Water Leak Sensor is not just a guardian; it’s also a smart assistant. It seamlessly integrates into your existing smart home ecosystem, allowing you to set up automation routines to respond to water detection. For example, you can configure it to turn off water supply valves, activate alarms, or even trigger smart lighting to guide you safely out of the affected area. With its long-lasting battery life and compatibility with popular smart home platforms, this sensor is a reliable and essential addition to any modern home. Don’t wait for water disasters to strike – stay ahead of the curve with the Aqara Water Leak Sensor and enjoy the peace of mind that comes with proactive home protection.
Automation Ideas
The Aqara Water Leak Sensor is a valuable device for preventing water damage in your home. Here are some useful automation ideas to make the most of this sensor:
- Early Leak Detection Alert – Set up a notification to receive an alert on your smartphone the moment the sensor detects water. This way, you can respond quickly and prevent further damage.
- Turn Off Water Supply – Connect the sensor to a smart water shut-off valve. When water is detected, the valve can automatically shut off the water supply to prevent flooding.
- Activate Sirens or Alarms – Link the sensor to a smart siren or alarm system. When water is detected, trigger a loud alarm to alert you and your household.
- Text or Email Notifications – Receive email or text notifications when the sensor detects water. This can be especially useful if you’re away from home.
- Smart Lighting Alert – Connect the sensor to smart lights. When water is detected, have the lights flash or change color to catch your attention.
- Pause Washing Machines and Dishwashers – Integrate the sensor with your washing machine and dishwasher. If a leak is detected, the sensor can pause the appliance to prevent water from spreading.
- Turn Off Humidifiers – If you use a humidifier, connect it to the sensor. When water is detected, the sensor can turn off the humidifier to prevent over-humidification.
- Home/Away Automation – When you leave home, automate actions based on the sensor’s status. For example, if water is detected while you’re away, set your thermostat to an energy-saving mode or activate security cameras.
- Alert Maintenance Services – If you have a professional maintenance service, like a plumber or water damage restoration service, set up automatic alerts to notify them when a leak is detected.
- Battery Monitoring – Set up an automation to notify you when the sensor’s battery is low so you can replace it before it fails.
- Insurance Discounts – Some insurance providers offer discounts for homes with smart water leak detection systems. Check if your provider offers such incentives.
- Voice Assistant Alerts – Connect the sensor to voice assistants like Google Assistant or Amazon Alexa. When water is detected, have the voice assistant announce the alert.
Remember to test your automation routines periodically to ensure that they work as expected and to replace the sensor’s battery as needed to maintain its reliability. These automations can help you proactively respond to water leaks and protect your home from costly damage.
Setup
Home Assistant
To set up your Aqara Water Leak Sensor in Home Assistant, you’ll need a compatible Zigbee hub or coordinator. Once you have that in place, follow these step-by-step instructions to integrate the sensor into Home Assistant:
Step 1: Open Home Assistant
- Open the Home Assistant web interface using a web browser on your computer or mobile device.
Step 2: Access the Integrations Page
- Click on “Configuration” in the sidebar on the left.
- Under “Integrations,” click the “+” (Add Integration) button to add a new integration.
Step 3: Search for Zigbee Integration
- In the search bar, type “Zigbee Home Automation” and select it from the search results.
Step 4: Configure Zigbee Integration
- Follow the on-screen instructions to configure the Zigbee integration. You may need to provide the IP address or other details of your Zigbee hub or coordinator. Refer to your hub’s documentation for these details.
Step 5: Pair the Aqara Water Leak Sensor
- Put your Aqara Water Leak Sensor into pairing mode. This usually involves removing the cover and pressing a button or holding a reset button until the LED indicator starts blinking.
- In Home Assistant, the Zigbee integration should detect the sensor. It will appear in the list of available devices.
Step 6: Add the Sensor
- Click on the sensor in the list to add it to Home Assistant.
Step 7: Configure the Sensor (Optional)
- You can customize the sensor’s name, room assignment, and other settings within Home Assistant. This step is optional but can help you organize your devices.
Step 8: Create Automations (Optional)
- To create automations based on the sensor’s status (e.g., sending alerts or triggering actions when water is detected), go to “Configuration” > “Automations” in the Home Assistant sidebar. Click the “+” (Add Automation) button to create a new automation.
Step 9: Testing
- Test the Aqara Water Leak Sensor by adding a small amount of water to the sensor or simulating a water leak. Make sure it triggers the expected actions in Home Assistant.
Step 10: Monitor and Customize
- Monitor the sensor’s status within the Home Assistant dashboard. You can further customize automations and notifications based on your specific needs and preferences.
That’s it! You’ve successfully set up your Aqara Water Leak Sensor in Home Assistant. You can now use it to monitor for water leaks and integrate it into your smart home automation routines.
Amazon Alexa
To set up your Aqara Water Leak Sensor with Amazon Alexa, you’ll need to integrate it through a compatible Zigbee hub or bridge that is already connected to your Alexa account. Here are step-by-step instructions to help you set up and use the sensor with Amazon Alexa:
Step 1: Ensure Compatibility
- Confirm that your Aqara Water Leak Sensor is connected to a compatible Zigbee hub or bridge. Common options include the Aqara Hub, Zigbee bridges like the Philips Hue Bridge, or Zigbee-enabled smart hubs like those from SmartThings.
Step 2: Enable the Alexa Skill
- Open the Amazon Alexa app on your smartphone or tablet.
- Tap on the menu icon (three horizontal lines) in the upper left corner.
- Select “Skills & Games.”
- Search for your Zigbee hub or bridge’s skill. For example, if you’re using the Philips Hue Bridge, search for “Philips Hue.”
- Enable the skill and follow the on-screen instructions to link it to your Alexa account.
Step 3: Discover Devices
- Once the skill is linked, return to the Alexa app’s home screen.
- Tap on “Devices” at the bottom of the screen.
- Select the “+” (Add Device) icon at the top right.
- Choose “Add Device.”
- Alexa will automatically search for new devices connected to your Zigbee hub or bridge. It should discover your Aqara Water Leak Sensor.
Step 4: Customize Device Name (Optional)
- After discovery, you can customize the name of your Aqara Water Leak Sensor in the Alexa app to make it easier to remember and use with voice commands.
Step 5: Test the Sensor
- You can now test your Aqara Water Leak Sensor by adding a small amount of water to the sensor or simulating a water leak. Make sure it triggers the expected actions in the Alexa app.
Step 6: Voice Control (Optional)
- If you have an Alexa-enabled device like an Echo speaker, you can use voice commands to check the status of the sensor or take actions when a water leak is detected. For example, you can say, “Alexa, is the water sensor wet?” or “Alexa, turn off [specific smart device] if the water sensor is wet.”
That’s it! You’ve successfully set up and integrated your Aqara Water Leak Sensor with Amazon Alexa. You can now monitor for water leaks and use voice commands to check its status or take actions based on its detections.
Apple HomeKit
To set up your Aqara Water Leak Sensor in Apple HomeKit, you’ll need to ensure that it’s already connected to an Aqara Hub or a compatible Zigbee hub that is HomeKit-enabled. Once that’s done, follow these step-by-step instructions to set up and use the sensor with Apple HomeKit:
Step 1: Open the Apple Home App
- Open the Apple Home app on your iOS device.
Step 2: Add an Accessory
- Tap the “+” (Add Accessory) button in the top right corner of the Home app.
Step 3: Scan the HomeKit Code (Optional)
- If your Aqara Water Leak Sensor has a HomeKit pairing code (usually found on a sticker or card that came with the device), you can scan it with your device’s camera. This will expedite the setup process.
Step 4: Manual Setup (If No Code)
- If you don’t have a HomeKit pairing code or scanning it doesn’t work, you can choose “Don’t Have a Code or Can’t Scan?” and manually enter the device’s information.
Step 5: Select the Accessory
- Find and select your Aqara Water Leak Sensor from the list of available accessories. It should appear as a discovered accessory.
Step 6: Assign to a Room
- Assign the sensor to a specific room within your HomeKit setup. This helps you organize and control devices more effectively.
Step 7: Customize the Name (Optional)
- You can customize the name of your Aqara Water Leak Sensor to something more recognizable or memorable.
Step 8: Assign Actions (Optional)
- Depending on your preferences, you can set up various actions or scenes triggered by the sensor’s status (wet or dry). For example, you can create a scene to turn off specific smart devices if water is detected.
Step 9: Complete the Setup
- After configuring the settings to your satisfaction, tap “Done” or “Finish” to complete the setup process.
Step 10: Test Your Device
- You can now test your Aqara Water Leak Sensor by adding a small amount of water to the sensor or simulating a water leak. Make sure it triggers the expected actions in the Home app.
Step 11: Voice Control (Optional)
- If you have a HomeKit-enabled smart speaker or device (e.g., HomePod or Apple TV), you can use Siri for voice control. Simply say something like, “Hey Siri, is the water sensor wet?”
That’s it! Your Aqara Water Leak Sensor is now set up and integrated with Apple HomeKit. You can monitor for water leaks and create automation routines based on its detections for added convenience and home protection.
Google Home
Setting up your Aqara Water Leak Sensor with Google Home involves using a compatible Zigbee hub or coordinator and integrating it into your Google Home ecosystem. Here’s a step-by-step guide to help you set up and use the sensor with Google Home:
Step 1: Prepare Your Hardware
- Ensure your Aqara Water Leak Sensor is within range of your Zigbee hub or coordinator.
- Make sure your Zigbee hub or coordinator is set up and functioning correctly.
Step 2: Connect Your Zigbee Hub to Google Home
- Open the Google Home app on your smartphone or tablet.
- Tap on your profile picture in the top right corner to access your account settings.
- Select “Assistant settings.”
- Scroll down and tap on “Home control.”
- Tap the “+” (Add) button to add a device or service.
- Search for and select your Zigbee hub or coordinator from the list of available services. Follow the on-screen instructions to link it to your Google Home account.
Step 3: Discover Devices
- Once the hub is linked, return to the “Home control” section in the Google Home app.
- Tap on “Devices.”
- Select the “+” (Add Device) icon at the top right.
- Choose “Add Device.”
- Google Home will automatically search for new devices connected to your Zigbee hub or coordinator. It should discover your Aqara Water Leak Sensor.
Step 4: Customize Device Name (Optional)
- After discovery, you can customize the name of your Aqara Water Leak Sensor in the Google Home app to make it easier to identify and use with voice commands.
Step 5: Test the Sensor
- You can now test your Aqara Water Leak Sensor by adding a small amount of water to the sensor or simulating a water leak. Make sure it triggers the expected actions in the Google Home app.
Step 6: Voice Control (Optional)
- If you have a Google Assistant-enabled device like a Google Nest speaker or display, you can use voice commands to check the status of the sensor or take actions when water is detected. For example, you can say, “Hey Google, is the water sensor wet?” or “Hey Google, turn off [specific smart device] if the water sensor is wet.”
That’s it! You’ve successfully set up and integrated your Aqara Water Leak Sensor with Google Home. You can now monitor for water leaks and use voice commands to check its status or take actions based on its detections.
Mi Home
To set up your Aqara Water Leak Sensor in the Mi Home app, follow these step-by-step instructions:
Note: Make sure your Aqara Water Leak Sensor is already paired with an Aqara Hub or a compatible Zigbee hub that is linked to your Mi Home account.
Step 1: Open the Mi Home App
- Open the Mi Home app on your smartphone or tablet. Make sure you’re signed in to your Mi Home account.
Step 2: Access the Devices Section
- Tap on the “Devices” tab at the bottom of the screen to access your connected devices.
Step 3: Add a New Device
- Tap the “+” (Add) icon in the top right corner to add a new device to your Mi Home ecosystem.
Step 4: Search for the Water Leak Sensor
- In the list of available categories, locate and select “Sensors.”
- Find and select “Water Leak Sensor” from the list of devices.
Step 5: Begin the Pairing Process
- The Mi Home app will prompt you to put your Aqara Water Leak Sensor into pairing mode. Typically, this involves removing the cover of the sensor and pressing a button or holding a reset button until the LED indicator starts blinking.
Step 6: Pair the Sensor
- Once the sensor is in pairing mode and the Mi Home app is scanning for devices, it should automatically detect the Aqara Water Leak Sensor. It will appear as a discovered device on the app.
Step 7: Confirm Device Details
- You may be asked to confirm details about the device, such as its name and room assignment. Customize these settings according to your preferences.
Step 8: Complete the Setup
- After confirming the device details, tap “Done” or “Finish” to complete the setup process.
Step 9: Test the Sensor
- You can now test your Aqara Water Leak Sensor by adding a small amount of water to the sensor or simulating a water leak. Make sure it triggers the expected actions in the Mi Home app.
Step 10: Customize Automations (Optional)
- If desired, you can create automation routines based on the sensor’s status, such as receiving notifications or triggering other smart devices when water is detected.
That’s it! Your Aqara Water Leak Sensor is now set up and integrated with the Mi Home app. You can use it to monitor for water leaks and create automation routines for added convenience and home protection.
Other Resources
https://www.zigbee2mqtt.io/devices/SJCGQ11LM.html
https://www.aqara.com/en/product/water-sensor/specs/
